


Table of Contents
- Why Gear Quality Determines Survival Outcomes
- Durable Survival Gear Materials: What to Look For
- How to Choose Survival Equipment: A Step-by-Step Framework
- The Essential Survival Gear Checklist for Any Kit
- Field-Testing: How to Spot Reliability Before You Buy
- Common Gear Failure Points and How to Avoid Them
- Conclusion
- Frequently Asked Questions
Last Updated: September 13, 2026
Why Gear Quality Determines Survival Outcomes
The difference between functional and failing survival gear shows up in the field, usually at the worst possible moment. At Already Survival, the signs of high quality survival gear come down to measurable traits: material grade, construction method, and honest weight-to-utility math.
Most buyers focus on piece count. A 250-piece kit sounds impressive until you realize half those pieces are bandage strips and safety pins. Quality isn't quantity, it's whether each item survives repeated use, extreme temperatures, and real-emergency stress.
Durable Survival Gear Materials: What to Look For
Durable survival gear materials fall into three categories: metals, textiles, and coatings. Each has failure points you can spot before purchase. The goal isn't memorizing brand names, it's reading a spec sheet and knowing within a minute whether a product will survive a real emergency.
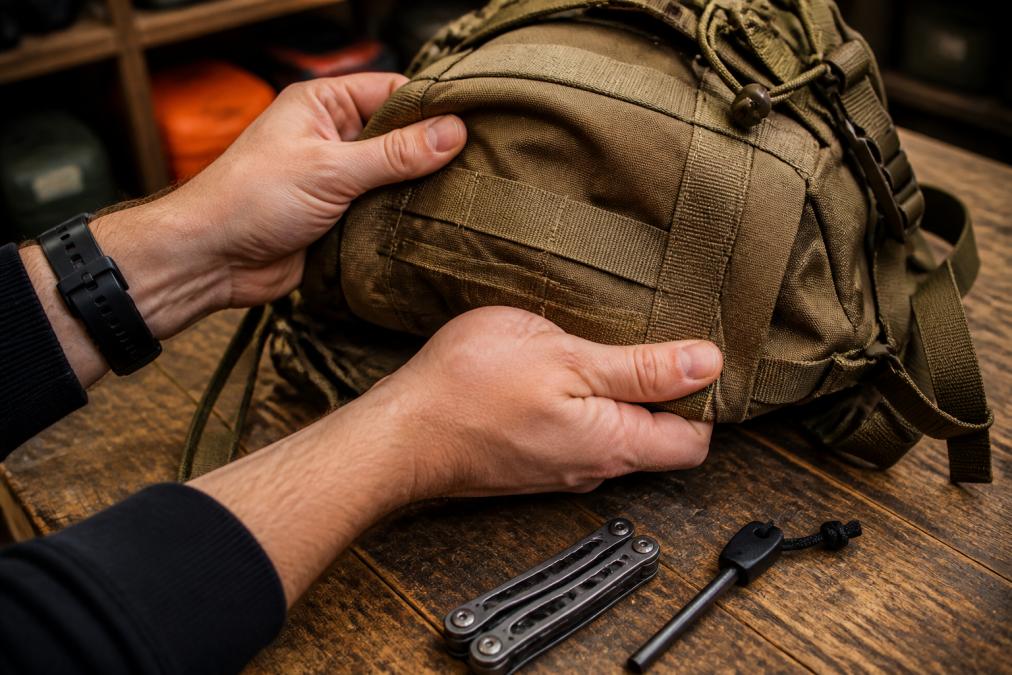
Metals: Alloy Choice and Heat Treatment
Steel quality comes down to alloy and heat treatment. A premium alloy with a bad heat treat performs worse than a budget alloy with a good one, so hardness ratings matter more than marketing claims.
High-carbon steel such as 1095 or 5160 holds an edge longer than stainless but corrodes faster without maintenance. Look for 55-60 HRC: below 55 the edge rolls, above 60 the blade chips under lateral stress.
Stainless steels trade edge retention for corrosion resistance: 440C resists rust far better than 1095 but dulls faster. For a humid vehicle kit, stainless is smarter; for a pack knife you sharpen regularly, high-carbon wins.
Aluminum alloys follow the same pattern. 6061-T6 is the workhorse for multi-tool bodies and flashlight housings; 7075-T6 is stronger but pricier and harder to machine. "Aircraft aluminum" without a temper designation is marketing, not a spec.
Titanium is corrosion-proof and light but softer than steel at the same thickness, chosen for weight savings, not edge retention or pry strength.
Textiles: Denier, Weave, and Coating
Denier measures fiber thickness. A 1000D nylon pack resists abrasion better than 400D but weighs more and feels stiffer. For shelters, 70D ripstop with a silicone coating balances weight and tear resistance, the ripstop grid stops tears from propagating, so 70D ripstop outperforms heavier non-ripstop nylon in puncture scenarios.
Weave matters as much as denier: plain weave is abrasion-resistant but stiff, ripstop trades abrasion resistance for tear resistance, and twill sits between them. Hold a pack or tarp to the light, if a product marketed as ripstop shows no grid, it probably isn't.
Tensile strength tells you how much pulling force a material handles before breaking. Paracord rated at 550 pounds (mil-spec) works for most lashing and ridgelines; anything below that is decorative cord. Likewise, 1-inch nylon webbing rated for 4,000 pounds is load-bearing; the same width at 600 pounds is a strap, not a lifeline.
Coatings and Finishes: Where Gear Quietly Fails
Coatings are the most overlooked quality signal because they fail invisibly. A waterproof coating that cracks at fold points lets water in without a visible hole; a powder coat that flakes exposes bare metal to corrosion; a DWR finish that washes out leaves fabric that wets out and stops breathing.
Flex a coated product at its seams and folds: whitening or cracking means it's already compromised, and a tacky feel or solvent smell suggests it never cured properly. For shelters, silicone-coated fabrics such as silnylon or silpoly can offer excellent long-term water resistance and durability, while polyurethane coatings are also widely used and can be easier to work with depending on the construction.
How to Inspect a Product in Under a Minute
You don't need a lab to evaluate materials. Use this sequence:
- Read the spec, not the slogan. Look for alloy designations (1095, 6061-T6), denier numbers (70D, 1000D), and hardness ratings (55-60 HRC).If important specifications aren't listed, treat the material quality as unverified rather than relying on marketing claims alone.If important specifications aren't listed, treat the material quality as unverified rather than relying on marketing claims alone.
- Flex every coated surface. Cracks, whitening, or flaking mean the coating is already failing.
- Check the weave. Ripstop should show a visible grid.
- Weigh it against its claimed function. Consider weight in relation to function. Heavier gear may offer greater durability, while lighter multi-purpose gear can make more sense when pack weight is a priority.
- Look at the fasteners. Cheap screws strip, buckles crack, and zippers jam, the first failure points on any gear.
Repairability as a Material Signal
The materials that make gear repairable usually make it durable: leather can be stitched and conditioned, canvas patched, high-carbon steel resharpened and rehandled, nylon webbing re-sewn. Molded plastic housings, heavily glued construction, and proprietary battery systems can be more difficult or expensive to repair once they fail.
At similar prices, favor the product you can fix with a needle, cord, and sharpening stone,At similar prices, consider gear that can be repaired with basic tools and commonly available materials. Repairability can be a useful sign of practical, long-term value.
How to Choose Survival Equipment: A Step-by-Step Framework
Choosing survival equipment starts with matching gear to your actual scenarios, not a generic checklist. Use this five-step framework:
- Define your three most likely emergencies.Define the emergencies most relevant to your location and situation. Examples might include power outages, vehicle breakdowns, severe weather, wildfires, flooding, or other regional hazards.
- Set a weight budget. Set a realistic weight budget. A Go Bag should be light enough for you to carry comfortably for the distance and conditions you expect (ready.gov). while vehicle kits can accommodate heavier supplies.
- Prioritize redundancy in critical systems. Two fire-starting methods, two light sources, two water treatment options.
- Check repairability. Can you replace the battery, resharpen the blade, or patch the fabric?
- Test one item at a time. Never field-test an entire kit for the first time during an actual emergency.
Evaluating Weight-to-Utility Ratios
One useful way to evaluate gear is to compare its weight with the number and importance of the functions it performs. A lightweight multi-tool that replaces several separate tools may earn its place in a carry kit, while a heavier single-purpose item may be better suited to a vehicle or home emergency kit. An 8-ounce multi-tool replacing four tools wins; a 3-pound folding shovel used once a year loses.
Gear Category |
Typical Weight |
Core Function |
Utility Verdict |
|---|---|---|---|
Ferro rod + striker |
2-3 oz |
Fire starting |
High, durable and compact |
Signal mirror |
1-2 oz |
Rescue signaling |
High, lightweight and low maintenance |
Multi-tool |
6-9 oz |
Cutting, gripping, driving |
High, multiple functions in one tool |
Folding shovel |
2-3 lb |
Digging, snow |
Best suited to vehicle or heavier kits |
Water filter pump |
12-16 oz |
Drinking water |
Useful, depending on size and application |
The Essential Survival Gear Checklist for Any Kit
An essential survival gear checklist covers five systems: water, fire, shelter, signaling, and first aid. Build each independently, then combine them.

- Water: filtration system plus purification tablets as backup
- Fire: ferro rod, waterproof matches, and a tinder bundle in a sealed bag
- Shelter: emergency bivvy or tarp with cordage rated for load-bearing
- Signaling: signal mirror, whistle, and a compact headlamp with spare batteries
- First aid: bandages, wound-care supplies, antiseptic, and other first-aid essentials appropriate for your kit
Already Survival stocks complete kits built around these five systems, including a 250-piece survival and first aid kit that organizes everything into labeled compartments for fast access under stress.
Field-Testing: How to Spot Reliability Before You Buy
Field-testing reveals reliability no product listing can show. Before trusting any new item, run these checks at home:
-
Fire starters: Practice using the fire starter in a safe, controlled environment so you know how it performs before an emergency.
Water filters: Test the filter according to the manufacturer's instructions and become familiar with its flow rate, cleaning requirements, and storage procedure.
Knives and cutting tools: Check that handles, locks, hinges, and edges are secure, and practice normal cutting tasks appropriate for the tool.
- Zippers and seams: Load the bag to its rated capacity and stress every zipper. Stitching that pulls or frays under load is a failure waiting to happen.
The U.S. Department of Homeland Security's Ready.gov preparedness guidance recommends testing your emergency supplies before you need them, and rotating stored items regularly. That advice applies directly to gear evaluation.
Common Gear Failure Points and How to Avoid Them
Gear failure concentrates in predictable places: fasteners, coatings, connection points, and consumables. Knowing where things break lets you inspect for weakness before it costs you.
Failure Mode 1: Fastener Loosening Under Vibration
Threaded connections on multi-tools, folding tools, flashlights, and other adjustable gear can loosen over time from repeated use and vibration. Periodically inspect screws, pivots, clips, buckles, and other connection points for movement or wear.
Check adjustable connections periodically and follow the manufacturer's maintenance instructions if anything becomes loose. Catching a loose fastener early can prevent additional wear or equipment failure.
Failure Mode 2: Coating Flaking at Flex Points
Coatings fail where material flexes: the pivot and lock bar on a folding knife, the ridgeline and stake-out points on a tarp, the shoulder strap attachment and bottom panel on a pack. Once coating flakes, the underlying material is exposed to moisture, abrasion, and UV.
Flex each point through its normal range of motion and look for whitening, cracking, or flaking. If you find damage, follow the manufacturer's repair recommendations or consider replacing the item if the coating is important to its weather resistance or protection.
Failure Mode 3: Connection Point Fatigue
Connection points, the stitching, webbing loops, and buckles joining components, absorb the most stress and fail first: a shoulder strap pulling out at the anchor, a buckle cracking under load, a zipper separating at the slider.
Inspect straps and loops at their anchor points, load packs within their rated capacity, and operate each zipper several times. Look for loose stitching, fraying, cracked buckles, separating seams, or other signs of excessive wear.
Failure Mode 4: Consumable Degradation
Consumable items can degrade over time: adhesive bandages may lose their stick, batteries can leak or lose charge, water purification products can expire, and tinder can absorb moisture. Regular inspection helps identify these problems before the supplies are needed.
Inspect your kit regularly and replace expired, damaged, leaking, or degraded items according to manufacturer recommendations. Store moisture-sensitive supplies appropriately and check batteries periodically for leakage, corrosion, or loss of charge.
Failure Mode 5: Field Repair Limits
Some failures are repairable in the field; some are terminal. A chipped knife edge can be resharpened, a torn pack seam stitched, a tarp pinhole patched with tape, but a snapped plier jaw, a failed flashlight driver circuit, or a cracked filter housing is done.
When buying, ask which failure modes are repairable. A knife that chips but resharpens beats one that snaps; a pack that tears but stitches beats one that delaminates.
A Practical Inspection Routine
Run this routine before every trip and every six months in storage:
- Flex every hinge and joint, listening for grinding or play
- Tug every strap and loop at its anchor point
- Inspect waterproof coatings for cracking at folds
- Test batteries and replace or recharge them as needed according to the device manufacturer's recommendations.
- Verify consumables are in date and stored dry
- Confirm field-repair supplies (needle, thread, tape, cord) are present and usable
The Repairability Advantage
Gear that can be repaired in the field can offer an advantage when replacement equipment isn't readily available. A torn seam may be repaired with a needle and thread, a small fabric puncture may be patched with an appropriate repair material, and some cutting tools can be resharpened. Other failures, such as broken internal components or damaged electronics, may require professional repair or replacement.
When comparing products, consider how easily common wear or damage can be repaired. Replaceable parts, repairable seams, and straightforward construction can help extend the useful life of your gear.
For families building their first kit, Already Survival's 125-piece outdoor survival and multi-tool kit pairs tools with first aid supplies in one compact case, which makes routine inspection and repacking far easier than managing loose items.

Conclusion
Building a reliable kit takes patience and honest evaluation, not a bigger shopping cart. The signs of high quality survival gear are consistent: proper material grades, redundant critical systems, and construction that survives testing. Already Survival offers carefully selected products from trusted suppliers, free shipping on every order, and a 30-day return policy on unused items so you can inspect your gear before committing. Explore our survival gear to find the equipment and supplies that fit your emergency preparedness needs.
Frequently Asked Questions
What are the 5 C's of survival?
The 5 C's of survival are cutting tool, combustion device, cover, container, and cordage. They provide a useful framework for covering several basic survival needs, including shelter, fire, and water. When evaluating survival gear, look for durable, practical equipment suited to your environment and emergency plan. A cutting tool, reliable fire-starting method, appropriate shelter, water container, and dependable cordage can form a strong foundation for a preparedness kit.
How can you tell if a survival tool is durable?
Look for clearly stated materials, solid construction, secure stitching or connection points, and components appropriate for the tool's intended use. Check metal parts for corrosion resistance, fabrics for abrasion and tear resistance, and hinges, locks, buckles, and zippers for excessive movement or weakness. Product specifications, warranty information, and reviews describing long-term use can also help you evaluate durability.
What materials indicate high-quality camping and survival gear?
Key materials include high-carbon steel for cutting tools, ferrocerium for fire starters, and ripstop nylon with a denier rating of High-quality camping and survival gear can use many different materials depending on its purpose. Examples include properly treated carbon or stainless steel for tools, ferrocerium for fire starters, and durable nylon, polyester, canvas, or other weather-resistant fabrics for bags and shelters. Look beyond the material name and consider construction quality, coatings, stitching, corrosion resistance, and manufacturer specifications appropriate for the product's intended use.
Why is gear weight and portability important for survival?
Weight and portability affect how comfortably and efficiently you can carry emergency supplies. A kit that is unnecessarily heavy can become difficult to transport, especially if you need to travel on foot. Prioritize essential equipment and consider lightweight, multi-purpose items when appropriate. Vehicle and home emergency kits can accommodate heavier supplies, while a portable Go Bag should be manageable for the person expected to carry it.


