


Table of Contents
- Step 1: Identify the Likely Hazards Where You Live
- Step 2: Build Your Family Emergency Plan Around Household Members
- Step 3: Write Your Emergency Communication Plan
- Step 4: Map Your Home Evacuation Plan and Escape Routes
- Step 5: Decide When to Shelter in Place and When to Evacuate
- Step 6: Assemble Supplies With a Home Emergency Kit Checklist
- Step 7: Practice, Review, and Update Your Home Disaster Plan
- Frequently Asked Questions
Last Updated: October 13, 2026
Step 1: Identify the Likely Hazards Where You Live
A home disaster plan starts with one question: what is most likely to happen where you live?
The most common hazards across the country are floods, wildfires, hurricanes, tornadoes, winter storms, earthquakes, and extended power outages. Your list depends on your region.
Match Your Plan to Your Region's Risks
- Coastal areas: hurricanes, storm surge, flooding
- Inland plains: tornadoes, severe thunderstorms
- Dry West: wildfires, smoke, drought
- Cold climates: blizzards, ice storms, power loss
Check your state and county emergency management websites for local hazard maps. The FEMA ready.gov hazard information outlines the main natural disasters and how to prepare for each.
Write your top three hazards on paper. Every step below builds on that list.
How the Plan Changes by Hazard
Naming your hazards is not the same as planning for them. Each one changes where you shelter, what you pack, and how early you leave. Use the notes below to adjust the rest of this guide.
- Floods: Move valuables and documents to a higher floor before water arrives. Never drive through standing water, since moving water can sweep a vehicle off a road. Plan to evacuate early, because flood roads close fast and alternate routes flood too.
- Wildfires: Prepare a go-bag that can leave in minutes. Keep gutters and the area near the home clear of dry debris, and plan two exit routes in opposite directions in case one is closed by fire or smoke.
- Hurricanes: Plan for both evacuation and sheltering, since the decision can change as the storm shifts. Cover windows ahead of landfall, charge devices early, and expect power and water outages that can last well past the storm.
- Tornadoes: Identify an interior room on the lowest level, away from windows. Practice reaching it in under a minute, and keep helmets or sturdy shoes there for after the storm passes.
Prioritize the Risks That Are Actually Yours
A household in a wildfire zone and a household in a hurricane zone need different kits, different evacuation triggers, and different meeting places. Rank your top three hazards by how likely they are and how much warning you would get. Hazards with little warning, like tornadoes and earthquakes, need practice and shelter plans. Hazards with days of warning, like hurricanes, need evacuation routes and supply staging.
Step 2: Build Your Family Emergency Plan Around Household Members
A family emergency plan works only when it fits the real people in your home. Count everyone: adults, children, older adults, and anyone with medical needs. Then count the pets.
Every household member should know three things: where to go, who to call, and what job is theirs.
Planning for Children, Older Adults, and Medical Needs
Children need the plan explained in simple words, more than once. Older adults may need help with mobility, hearing, or vision during an emergency.
For medical topics, we keep it general. The CDC emergency preparedness resources offers guidance for people with disabilities and medical conditions.
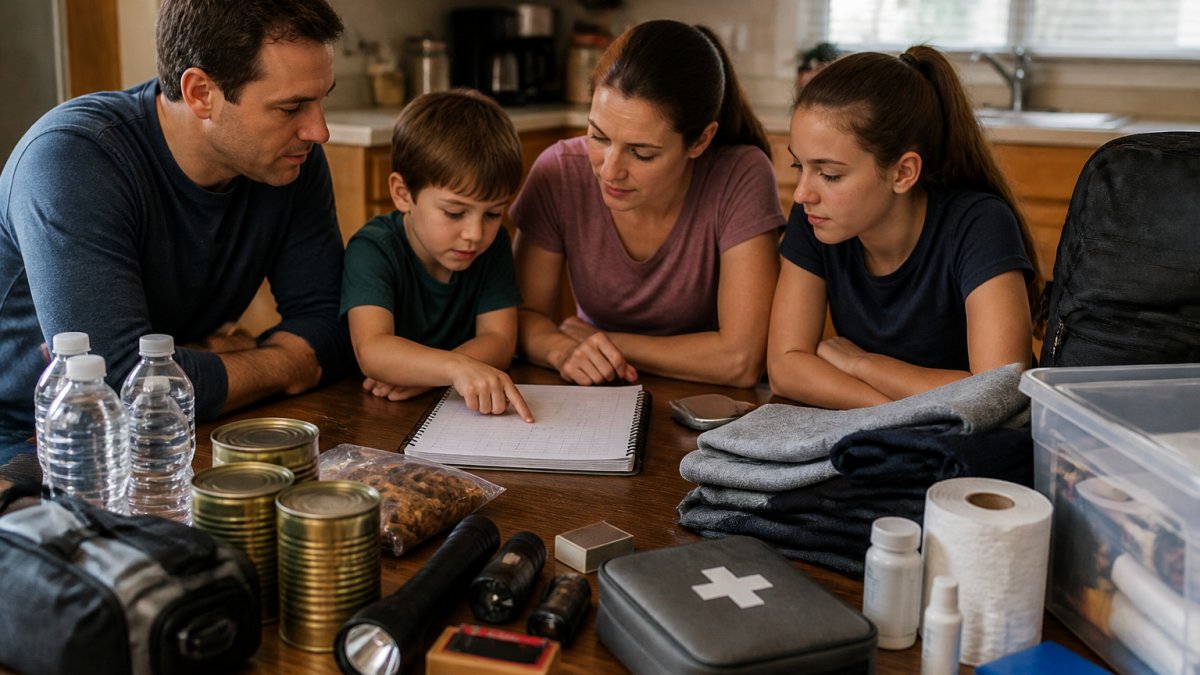
A family sitting around a kitchen table with a notebook, reviewing a handwritten emergency plan together, with a child pointing at the page
Pets and Service Animals
Pets are part of the plan, not an afterthought. Many shelters do not accept animals, so identify pet-friendly options in advance. Pack a pet go-bag with food, water, a leash, and records. Service animals generally accompany their handlers in emergency shelters under the ADA, even when pets are not permitted. Identify pet-friendly shelter options separately and include supplies for both pets and service animals.
Assign each person a role. One adult handles the kit. Another handles the kids. A teenager can grab the pet supplies. Write the roles down.
Step 3: Write Your Emergency Communication Plan
An emergency communication plan keeps your household connected when phone networks fail. Text messages often get through when calls do not, so make texting the default.
Build a contact list with:
- One out-of-area contact (local lines may be jammed)
- A meeting place near home
- A backup meeting place outside your neighborhood
- School and workplace phone numbers
Print two copies. Put one in your kit and one on the fridge. The FCC emergency communications guidance explains how to reach family during a crisis.
Step 4: Map Your Home Evacuation Plan and Escape Routes
A home evacuation plan maps two ways out of every room. Fires and gas leaks give you seconds, not minutes.
Sketch your floor plan on paper. Mark doors and windows. Then walk it with your household.
- Draw two exits from each bedroom
- Check that windows open and screens come out
- Keep hallways and stairs clear
- Test smoke alarms and note the sound
- Pick a spot outside where everyone meets
Practice the route at night, when most home fires happen.
Meeting Places and Reunification
Choose two meeting places. The first is right outside your home, like a mailbox or a neighbor's driveway. The second is outside your neighborhood, in case you cannot return.
Make sure everyone knows both meeting places and has the addresses written down. If you are separated, use the meeting place appropriate to the emergency only when it is safe to reach. Follow school, workplace, and official reunification instructions, and never return to an unsafe home.
Step 5: Decide When to Shelter in Place and When to Evacuate
Sheltering in place means remaining in a safer indoor location appropriate to the hazard. For a tornado, use a basement or small interior room on the lowest level, away from windows. For an outdoor chemical release, officials may instruct you to close windows, turn off ventilation, and seal a designated room. Wildfires, floods, and hurricanes may require evacuation depending on your location and official instructions. A suspected gas leak inside your home requires immediate exit.
Follow local emergency alerts. Sign up for your county warning system and keep a battery-powered radio for backup. If officials say go, go early. Roads clog fast.
Step 6: Assemble Supplies With a Home Emergency Kit Checklist
A home emergency kit carries you through the first days when stores are closed and power is out. Build it around food and water, first aid, light, and warmth.

4 Person 72-Hour Essential Survival Kit with First Aid
Use this home emergency kit checklist:
- Water for drinking and sanitation
- Non-perishable food
- Manual can opener
- First aid kit
- Flashlights and extra batteries
Needs vary by household size, ages, health, climate, and how long an emergency lasts. Adjust quantities to your situation.
Already Survival carries kit options for different needs. The 4 Person 72-Hour Essential Survival Kit with First Aid is built for a family of four over a short-term emergency. The Family Blackout Kit, Backpack suits power outages with light, radio, and shelter items. For storm season, the Hurricane Emergency Kit packs supplies into a portable backpack.


Documents, Medications, and Utility Shutoffs
Store copies of important documents in a waterproof bag: IDs, insurance, bank records, and medical lists. Keep medications current and rotate them. Know how to shut off water, gas, and power, and teach adults in the home. Only shut off gas if you smell it or hear a leak, and let the utility restore it.
Step 7: Practice, Review, and Update Your Home Disaster Plan
A plan on paper is a draft. A plan you have practiced is a real one. The difference between the two is a schedule and a record.
Set a Practice Cadence
Pick dates and put them on the calendar. A workable cadence looks like this:
- Monthly: Test smoke and carbon monoxide alarms. Walk the escape routes with everyone in the home, including at night at least once.
- Twice a year: Run a full home fire drill. Time how long it takes everyone to reach the outside meeting place, then compare it to the last drill.
- Twice a year: Run a shelter-in-place drill for your top hazard, such as a tornado or chemical release. Practice moving to the interior room and closing up the house.
- Annually: Run an evacuation drill. Pack the go-bag, load the vehicle, and drive the primary route. Then drive the backup route.
Keep a Written Log
A log turns practice into progress. For each drill, note the date, who took part, how long it took, and what went wrong. Common entries include a stuck window, a missing flashlight, a contact number that changed, or a pet carrier that was too small. Fix one item per drill. Over a year, that adds up.
Verify the Plan With a Readiness Check
Once a quarter, walk through this checklist and mark anything that fails:
- Every household member can name the two meeting places from memory
- The out-of-area contact still answers at the listed number
- Printed contact lists are current in the kit and on the fridge
- Escape routes are clear of furniture, boxes, and clutter
- Windows in every bedroom open and screens come out
Update the Plan When Life Changes
A plan goes stale the moment the household changes. Update it when someone joins or leaves the home, when a child is old enough for a new role, when someone's medical needs change, when you move, when you change vehicles, or when your local hazard outlook shifts. Treat the plan as a living document, not a one-time project.
Frequently Asked Questions
How often should I review my home disaster plan?
Review your home disaster plan at least once a year, and again whenever your household changes. New baby, new pet, a family member moving in, a change in medical needs, or a new job with a different commute all affect your plan. Test smoke alarms and carbon monoxide alarms monthly, check expiration dates on food, water, and medications, and replace batteries as needed. A short seasonal check before storm or wildfire season keeps the plan current and makes sure everyone still knows their role.
What should a family emergency plan include for members who need extra help?
A family emergency plan should name a specific person responsible for helping each household member who needs assistance, including children, older adults, and anyone with mobility, sensory, or medical needs. Note who uses mobility equipment, who needs help hearing alerts, and who relies on powered medical devices. Keep a written list of medications and medical contacts, and store backup supplies for devices where possible. Share the plan with a trusted neighbor or caregiver who can step in if you are not home.
What should I include in a home emergency kit checklist?
A home emergency kit checklist should cover water, food, a first aid kit, medications, flashlights, a battery or hand-crank radio, extra batteries, hygiene items, and copies of important documents. Add items for your household: baby supplies, pet food, spare glasses, or a manual can opener. Quantities vary by household size, ages, health needs, climate, and how long you may need to be self-sufficient, so build the kit around your situation rather than copying a generic list. Store supplies in a portable bag so you can grab them quickly.
How should a household plan for evacuation?
A home evacuation plan starts with two ways out of every room and a clear path to the outside. Pick one meeting place right outside your home and a second one farther away in case the immediate area is not safe. Assign someone to grab the emergency kit and someone to help children, older adults, or pets. Keep gas in the car, park facing the street when possible, and follow local emergency alerts for evacuation routes. Practice the route with everyone in the household at least twice a year.
Most households mean to prepare and never start, because the whole task feels too big. Break it into the seven steps above and it becomes manageable in a weekend. Already Survival can help you finish the supply side with kits built for real emergencies, free shipping on every order, and a 30-day return policy on unused items. Search our site for the kit that fits your household, then practice the plan until it is second nature.


