


Table of Contents
- What You'll Need Before Starting
- Step 1: Determine Your Family's Specific Needs
- Step 2: Gather Water and Water Purification Supplies
- Step 3: Stock Non-Perishable Food for 72 Hours
- Step 4: Assemble a First Aid Kit Checklist for Families
- Step 5: Add Tools, Light, and Communication Gear
- Building an Emergency Kit for Hurricane and Power Outage Preparedness
- Common Mistakes to Avoid When Building Your Family Emergency Kit
- Frequently Asked Questions
Last Updated: September 22, 2026
What You'll Need Before Starting
Building a family emergency kit doesn't require expensive gear or specialized knowledge. A family emergency kit brings together supplies that can help your household manage the first several days of a disruption, such as a power outage, severe weather event, evacuation, or shelter-in-place situation.
Start by assessing what your household already owns. Most families have partial supplies scattered around, first aid items, flashlights, canned goods. Consolidate these into one organized location and fill the gaps.

Use a plastic bin, backpack, or cabinet for storage. Keep it accessible but out of the way, and label it clearly. Consider keeping a smaller version in your vehicle as well.
Gather supplies in these five main categories: water and purification, non-perishable food, first aid and medical items, tools and communication gear, and sanitation supplies. This structure keeps you organized and ensures you don't overlook critical categories.
Step 1: Determine Your Family's Specific Needs
Write down your household specifics before buying supplies. This determines quantities and which items matter most.
Note household size, any medical conditions, mobility limitations, or dietary restrictions. These factors determine what quantities and specialized items your kit needs.
Consider your climate and likely emergency scenarios. Families in hurricane-prone regions need different preparation than those facing winter storms or earthquakes. Households with young children need infant care, diapers, and formula supplies.
Write this information down as your personal emergency kit checklist, including ages, medications, dietary needs, and accessibility requirements.
If you have pets, add them to your assessment. Pets need water, food, and any medications they require. Include their vaccination records and microchip information in your emergency documents.
Step 2: Gather Water and Water Purification Supplies
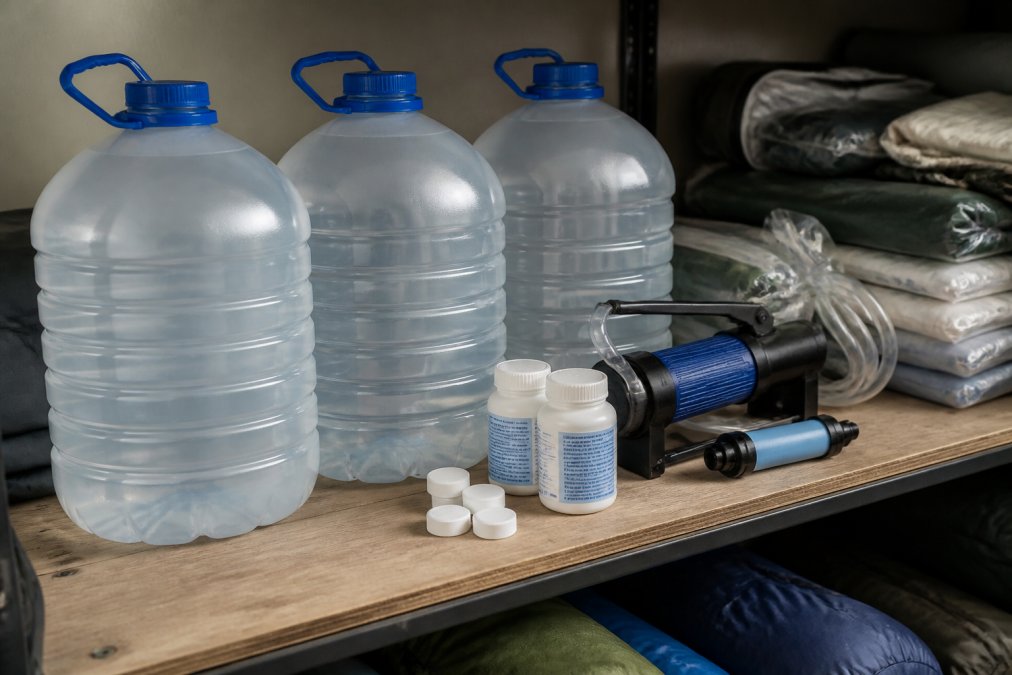
Water is essential for drinking and basic hygiene. A common guideline is one gallon per person per day, though actual needs vary by age, activity level, and climate.
Calculate your household's water needs for the period you're preparing for. Store water according to the container or manufacturer's instructions, protect it from contamination and extreme temperatures, and inspect stored water and containers periodically. Follow applicable guidance for replacing or rotating stored water.
Include water purification methods as backup. Water purification tablets and portable water filters complement each other and provide redundancy.
Include a portable water filtration system that doesn't require batteries or electricity, such as hand-crank or squeeze filters. Add instructions so household members know how to use them.
Store at least one large, clean container (like a food-grade bucket) that can hold water if you need to collect it from a source. Label it clearly for emergency use only.
Step 3: Stock Non-Perishable Food for 72 Hours
Stock non-perishable food that provides calories and nutrition without refrigeration, cooking, or much water for 72 hours.
Choose foods your family actually eats. A kit full of unfamiliar foods becomes useless during stress. Include familiar comfort foods alongside practical options.
Stock calorie-dense foods: energy bars, peanut butter, nuts, dried fruit, and canned meals. Include a manual can opener; electric openers don't work without power.
Include foods that don't require cooking or water: granola bars, crackers, nut butter, dried fruit, and chocolate. These are especially valuable in the first hours of an emergency.
Account for specific dietary needs, food allergies, and infant formula or baby food.
Periodically review your emergency food supply Check expiration or best-by dates, inspect packaging for damage, and rotate or replace foods as appropriate. Following the storage instructions for each product can help maintain quality and reduce waste.
Step 4: Assemble a First Aid Kit Checklist for Families
A family first aid kit handles minor injuries, protects against infection, and addresses common medical needs.
Include wound care supplies: adhesive bandages, gauze pads, medical tape, elastic bandages, antiseptic wipes, tweezers, and antibiotic ointment.
4 Person Necessity Survival Kit with →
Include over-the-counter pain relievers and fever reducers appropriate for your household members' ages. Follow product labeling and consult a healthcare professional about appropriate medications for your specific family members.
Depending on your household's needs, you may consider appropriate over-the-counter medications that you normally use. Follow product labeling and consider guidance from a healthcare professional or pharmacist when selecting medications. Keep prescription medications properly labeled and follow storage instructions provided with the medication.
Include specialized items based on your household's needs: cold packs, triangular bandages, and CPR face shields. Include supplies relevant to specific medical conditions, but avoid items requiring professional medical training.
Store first aid supplies in a waterproof, clearly labeled container with compartments. Include printed instructions and check expiration dates every six months.
For serious injuries or medical emergencies, encourage household members to take a recognized first aid or CPR course. These skills matter far more than any kit when serious injury occurs.
Item Category |
Examples |
Purpose |
|---|---|---|
Wound Care |
Bandages, gauze, tape, antiseptic wipes |
Clean and protect minor cuts and scrapes |
Pain & Fever |
Over-the-counter pain relievers, fever reducers |
Manage discomfort and fever safely |
Medications |
Prescription medications, antacids, antihistamines |
Address individual household medical needs |
Specialized Items |
Cold packs, triangular bandages, CPR shield |
Handle sprains and common emergencies |
Tools |
Tweezers, scissors, thermometer |
Support basic first aid procedures |
Step 5: Add Tools, Light, and Communication Gear
Practical tools and reliable light become essential when normal services fail. These items help you navigate, stay safe, and communicate with others.
Lighting options should include battery-powered and hand-crank alternatives. Battery-powered flashlights provide immediate, reliable light. Include extra batteries or hand-crank flashlights that generate light without batteries. Glow sticks offer light without batteries and work even if wet. Candles provide light but require careful handling in an emergency; use them only if you have stable, safe placement.
A battery-powered or hand-crank weather radio keeps you informed about emergency conditions and official guidance (the CDC). This is more reliable than your phone during widespread outages when cell networks become overloaded.
Include a multi-tool or basic tool set: a wrench or pliers for turning off utilities if necessary, a knife for cutting, and a screwdriver. These tools help you address practical problems that arise.
A whistle serves multiple purposes: signaling for help, organizing family members, or getting attention. It requires no batteries and works in any condition.
Include a cell phone charger, both a traditional charger if you have a generator or car power available, and a portable power bank that stores charge without external power. Phone communication becomes critical during emergencies, and a dead phone is useless.
Add local maps showing your area, major routes, and important locations. GPS and online maps require working phones and networks. Physical maps work when technology fails.
A notebook and pencil allow you to record important information, write messages, or keep notes about what happened and what you've done. Paper works without power.
Building an Emergency Kit for Hurricane and Power Outage Preparedness
Specific emergency scenarios require some kit adjustments. Hurricanes and power outages share common needs but differ in important ways.
For hurricane preparedness, consider the possibility of flooding, high winds, evacuation, and extended power or water disruptions. Waterproof or water-resistant storage can help protect important documents and supplies. Sturdy work gloves may be useful when dealing with debris. Consider whether your household would benefit from additional stored water, since severe storms can sometimes disrupt normal water service. Tarps, duct tape, and a manual can opener may also be useful additions depending on your situation.
For power outage preparedness, consider lighting, communication, temperature, and your household's medical or electrical needs. Having more than one safe light source can provide useful backup. Emergency blankets and appropriate clothing can help with warmth if normal heating is unavailable. If you use a fireplace, wood stove, generator, or other alternative heat or power source, follow the manufacturer's instructions and applicable safety guidance.
Both scenarios benefit from battery-powered entertainment, books, cards, or games help manage stress and keep children occupied.
Common Mistakes to Avoid When Building Your Family Emergency Kit
Avoid storing your kit in locations with extreme temperatures or excessive moisture when possible. Heat, cold, humidity, and temperature fluctuations can affect some foods, medications, batteries, packaging, and other supplies. Follow manufacturer storage instructions and choose a cool, dry, accessible location when appropriate.
Frequently Asked Questions
What should be included in a family emergency kit?
A family emergency kit should contain water (one gallon per person per day for several days), non-perishable food with a long shelf life, a first aid kit, sanitation supplies, a battery-powered or hand-crank radio, a flashlight, medications, important documents, and items for shelter and warmth like emergency blankets. Customize the kit based on your family's specific medical needs, ages, and the types of emergencies most likely in your area.
How much water should a family emergency kit include?
Store at least one gallon of water per person per day. For a 72-hour emergency supply, a family of four should have at least 12 gallons on hand. Water needs vary based on climate, activity level, and individual health conditions. Include water purification tablets or a filtration method as backup if you need to use additional water sources during an extended emergency.
How do I customize an emergency kit for different family members?
Assess each family member's individual needs. Infants and young children may require specific foods, diapers, and other care items. Older adults or people with mobility needs may require accessibility equipment or additional assistance. For prescription medications or medical equipment, plan ahead with a healthcare professional or pharmacist based on the individual's needs. Consider organizing personal items in clearly labeled compartments or bags, and periodically review the kit as household needs change.
Is it cheaper to make your own emergency kit or buy a pre-assembled one?
Building your own kit allows you to customize the contents for your household and may let you use supplies you already have. Pre-assembled kits can offer convenience by providing many preparedness items together in one package. Either approach can work, and some households may prefer to start with a pre-assembled kit and customize it with additional supplies for their individual needs.


